Free Tutorial Setup Email at Outlook.com
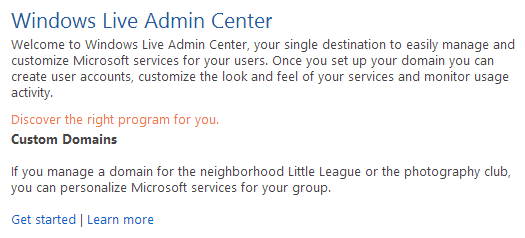
1) Sign into the Windows Live Admin Center. This is
where Microsoft has tucked away the slightly-hidden area that initiate
the capability for Outlook.com to connect with your domain's incoming
email. This is located at: https://domains.live.com/Signup/SignupDomain.aspx. You can click on the Get Started link on this page after signing in.

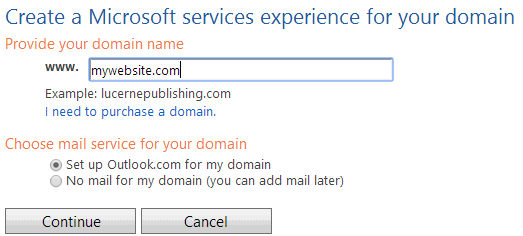
2) Plug in your custom domain name. From here, you
need to merely enter your custom domain name into the proper box. And be
sure that "Set up Outlook.com for my domain" is chosen just above the
Continue button.

3) Confirm your settings look correct. This is where Microsoft ensures everything looks right, and also asks you to accept their TOS for Outlook.com usage with a custom domain.

4) Prove your domain ownership through an MX change. This is where you need to be able to login to your registrar to make the change which enable mail flow to hit your new host, Outlook.com. Be aware that this WILL start routing email to Outlook.com fairly quickly (depending on your TTL setting, or Time to Live, on the MX record currently set). Don't go past this step if you are unsure about using Outlook.com for your ongoing email needs.
The first graphic below shows the screen Microsoft presents which gives you the necessary information to change your MX record. The second is a sample shot from my domain registrar, GoDaddy, for changing the MX records in their DNS Zone Editor. This process is different on every domain registrar so beware and consult your registrar for correct instructions. Call support if necessary -- this step can have devastating consequences on potentially lost email.


5) OPTIONAL but recommended -- SPF Record creation. Some hosts like 1and1 do not allow for TXT records on their DNS settings area, which prohibits you from using this spam fighting feature, but most other reputable domain registrars support them. You can use the TXT record entry option on your registrar to add in what is known as an SPF record. This simple little entry allows other email services which enforce the functionality to fight spam that would otherwise mask itself as coming from your domain to others. It's not critical to have, but it does help put a dent in the toolbag of the scummy spammers out there masquerading messages with your email domain on them.

6) Add your email accounts, up to 50 of them. This is where you will now be allowed to create all of the addresses (or accounts) you need on your new Outlook.com backbone. You have full control as the administrator to make any combination of addresses, up to 50, and give everyone an inbox that needs one. This beats the 10 account limit the free Google Apps used to have, so in some ways, this is actually pretty neat! If you use Outlook.com to host your family's personal domain, you can give every uncle and aunt their own email account.
7) Sign into your new Outlook.com powered custom email account! Now that you have setup your account, you can freely sign into your inbox and start playing around. Go through www.outlook.com just like any traditional user, and use your custom email domain address and password you just created. If you got your steps right from above, you should see your inbox and you can even write your first email.